・When using a type gauge, it is troublesome to adjust the display size of the PDF to the actual size.
・I want to proofread, but the author sends me image data, so converting it to PDF is troublesome.
If you use the "EditOnPDF" app to open and proofread images and PDFs, you can display type gauge and other gauges on the screen.
Since the type gauge and ruler can be displayed on the app, there is no need to carry around a physical type gauge and ruler!
In "Ver1.0", only the function to display "type gauge" and "grid" is implemented. Functions useful for proofreading, such as "writing with ApplePencil" and "data saving function", will be implemented at any time, so let's use it as a "PDF viewer" first!
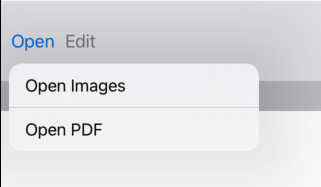
Open image
- Select "Open" > "Open Images".
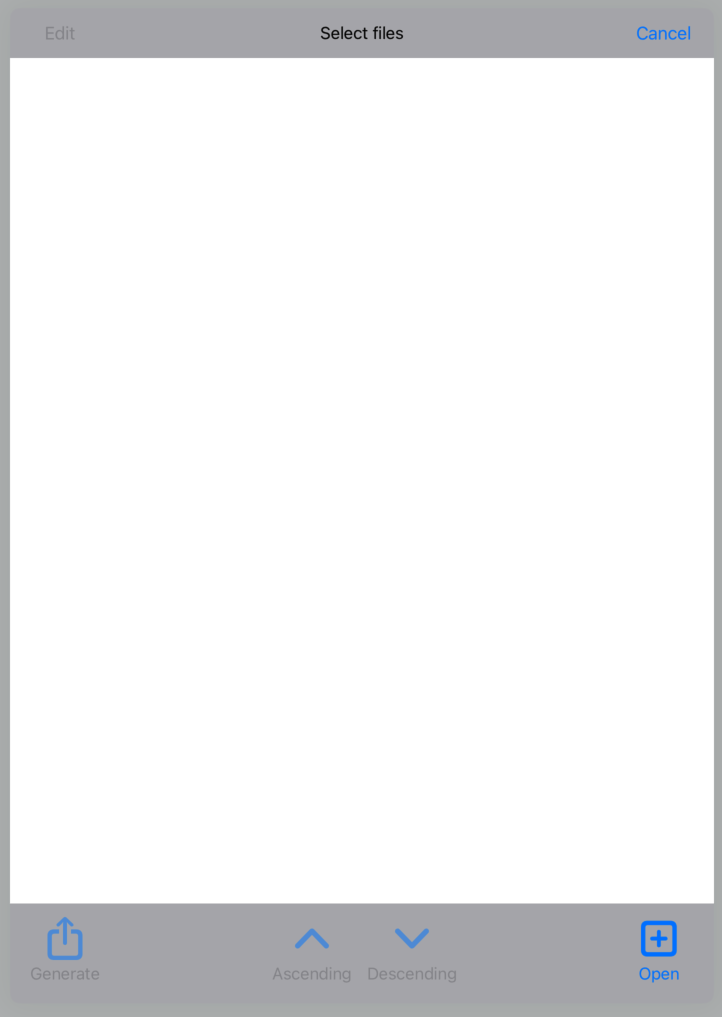
- Touch "Open" on the bottom right.
- When you select an image files, it will be displayed in the list.
Touch "Edit" at the top left to manually change the order, or touch "Ascending" or "Descending" at the bottom to sort and determine the order of the pages.
Finally, touch "Generate" to convert the image to PDF and display it.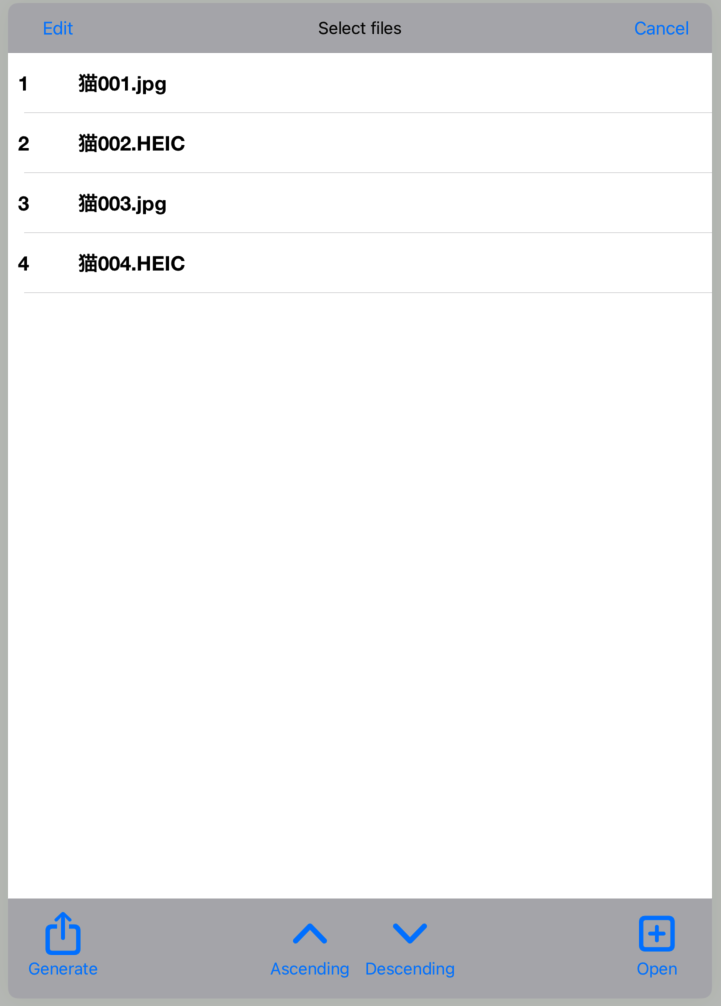

Open PDF
- Select "Open" > "Open PDF".

- If you select a PDF file, the PDF will be opened and displayed.

Increase or decrease margins
- Open an image or PDF.

- Select "Edit" > "Add Margins".
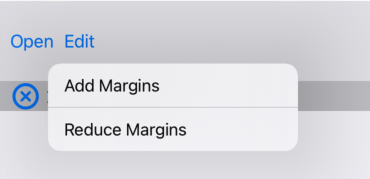
- White space is added around the edges.
You can add more margins by clicking "Add Margins" again.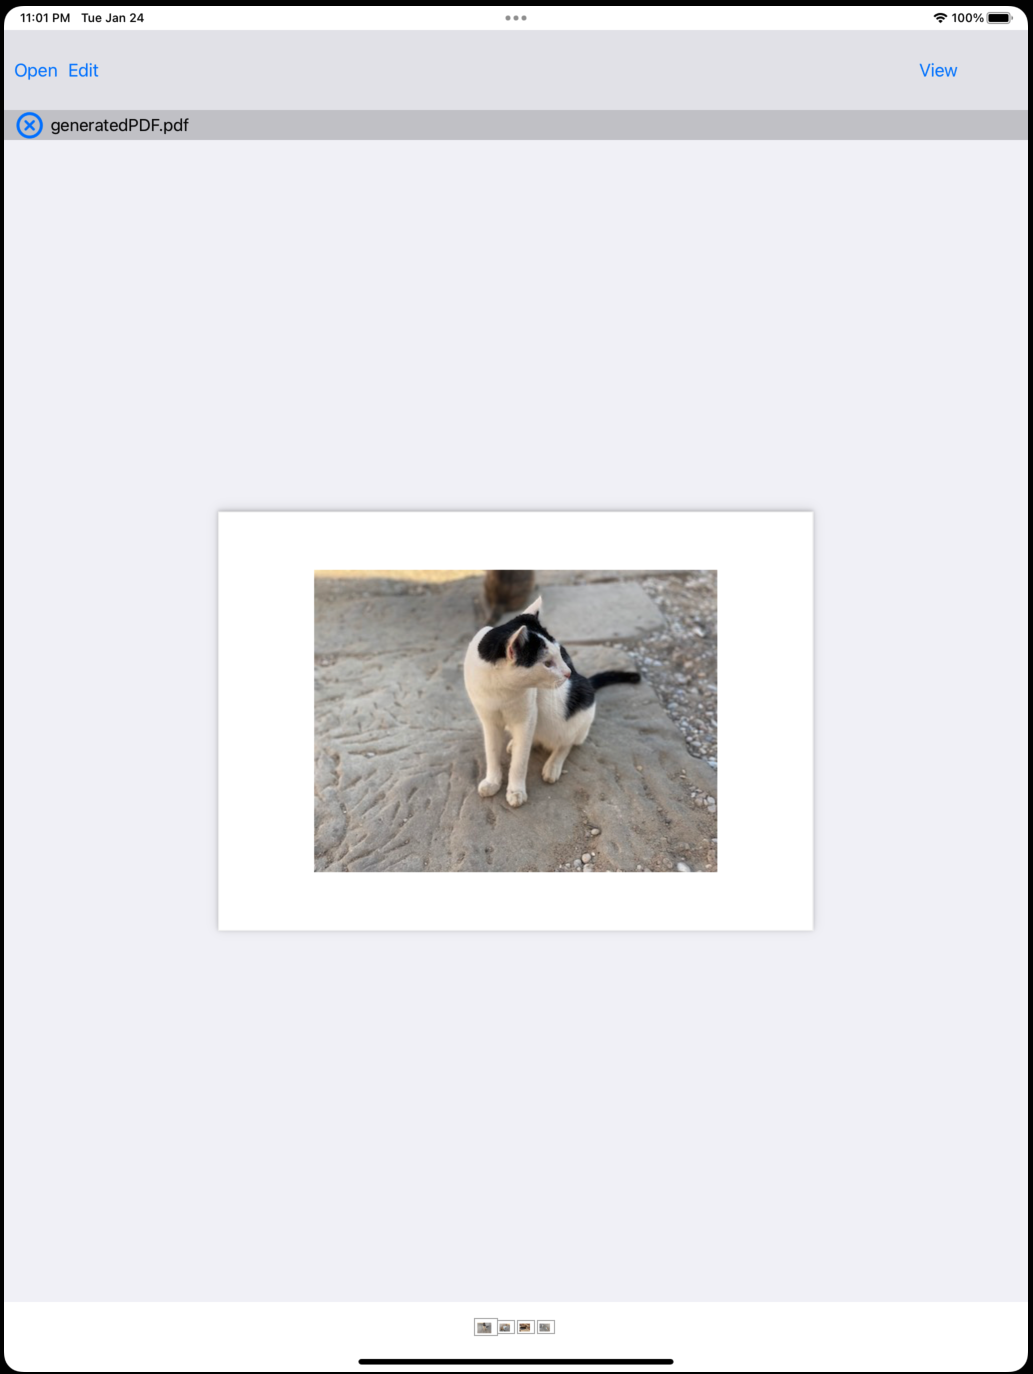
- Select "Open" > "Reduce Margins".

- The surrounding margins are reduced.
In addition, if you have "Add Margins" multiple times, the margin for one time will be reduced.
Change display method
- Select "View".
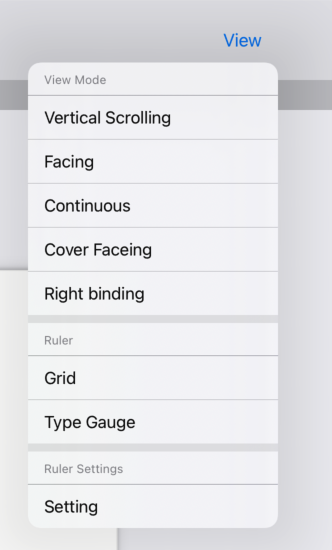
You can change how the PDF is displayed.
Vertical Scrolling: Switch between "horizontal scrolling" and "vertical scrolling"
Facing: Switch between "one page display" and "two page display"
Continuous: Switch between displaying pages continuously or displaying one page at a time (or two pages)
Cover Facing: When using "Facing", the first page is treated as the cover.
Right Binding: Switch between "Right Binding" and "Left Binding" when doing "Facing" or "Page Feed"
For "Continuous", if "horizontal scroll" is selected, the binding direction will be "left binding".
Display type gauge
- Select "View" > "type gauge".

- A type gauge is displayed.
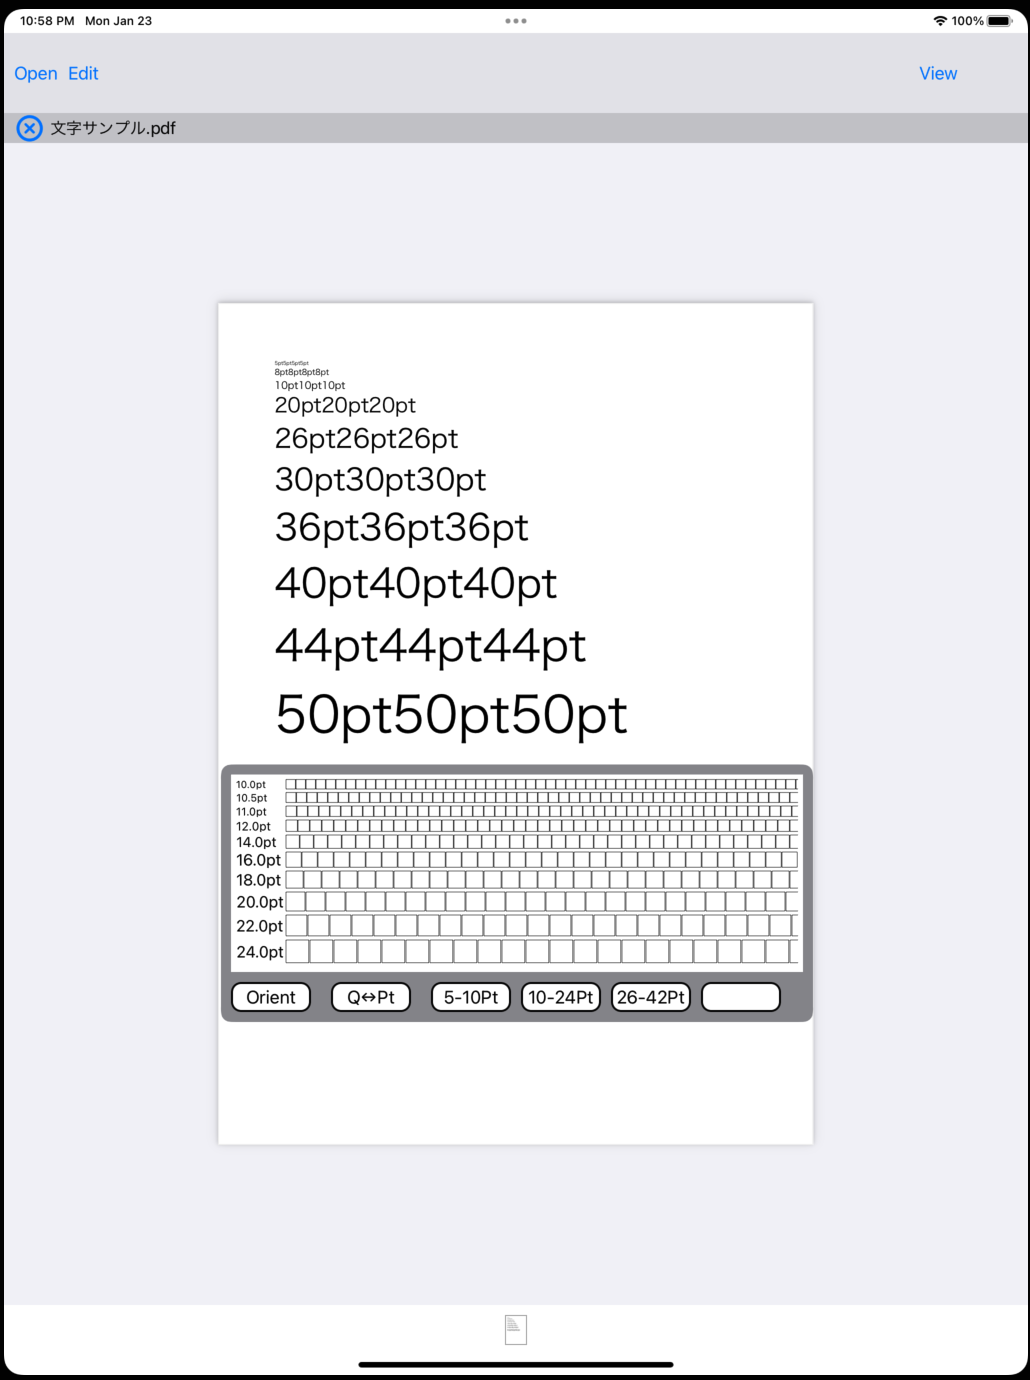
- Touch "Orient" to rotate the type gauge vertically.
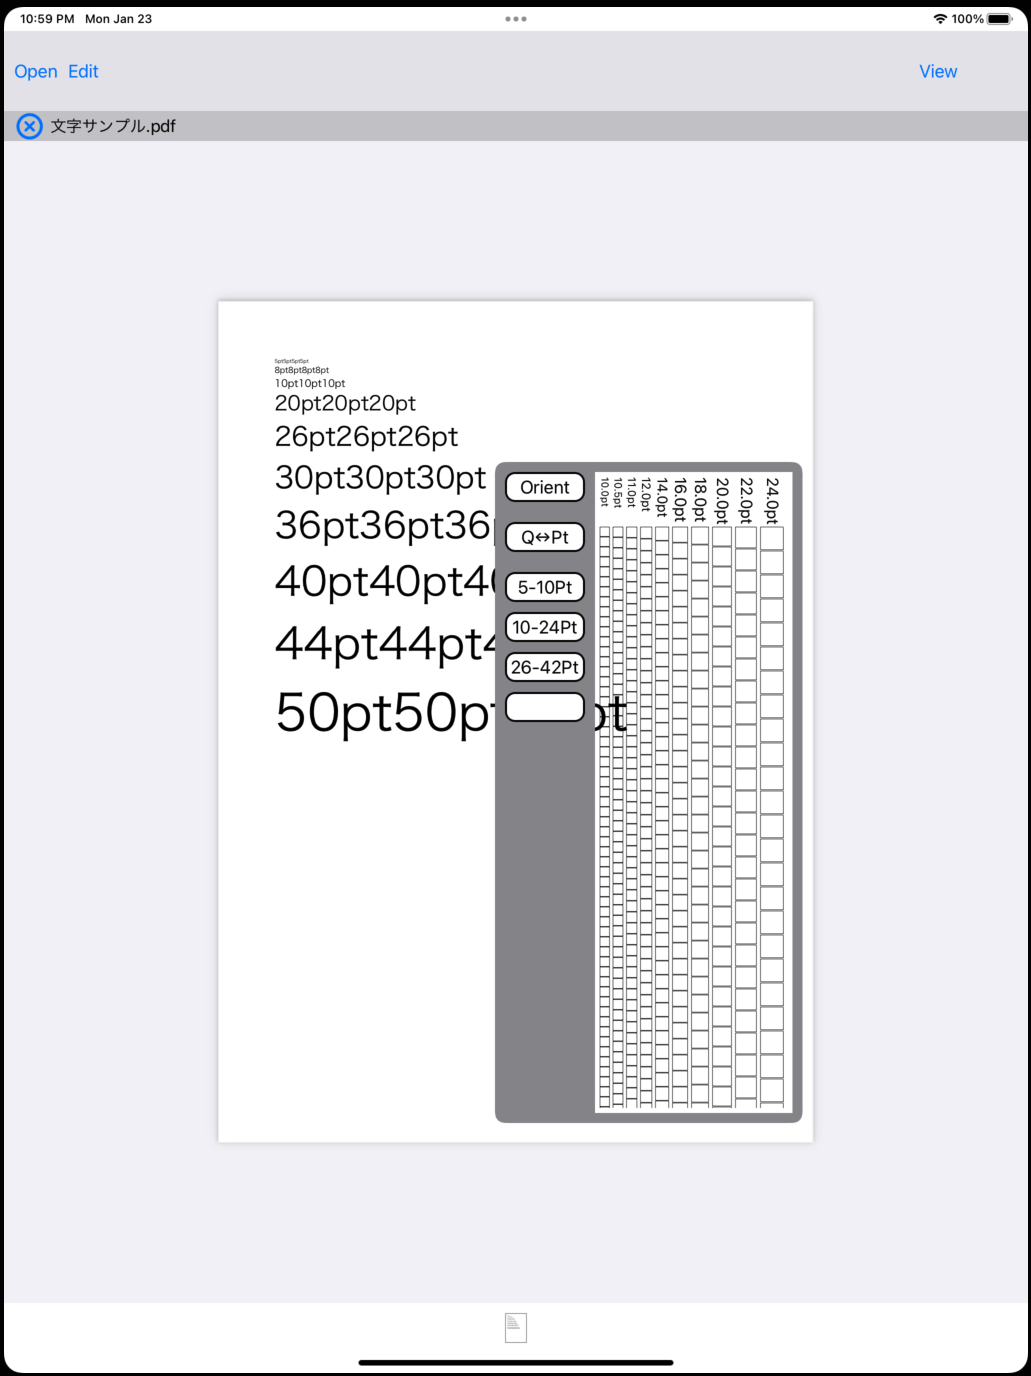
- If you want to switch the unit to "Q" or "Pt", touch "Q↔︎Pt".
- If you want to switch the size, touch the button for each size.
- To remove the type gauge, select "View" > "type gauge" again.
Show grid
- Select "View" > "Grid".

- A grid appears.
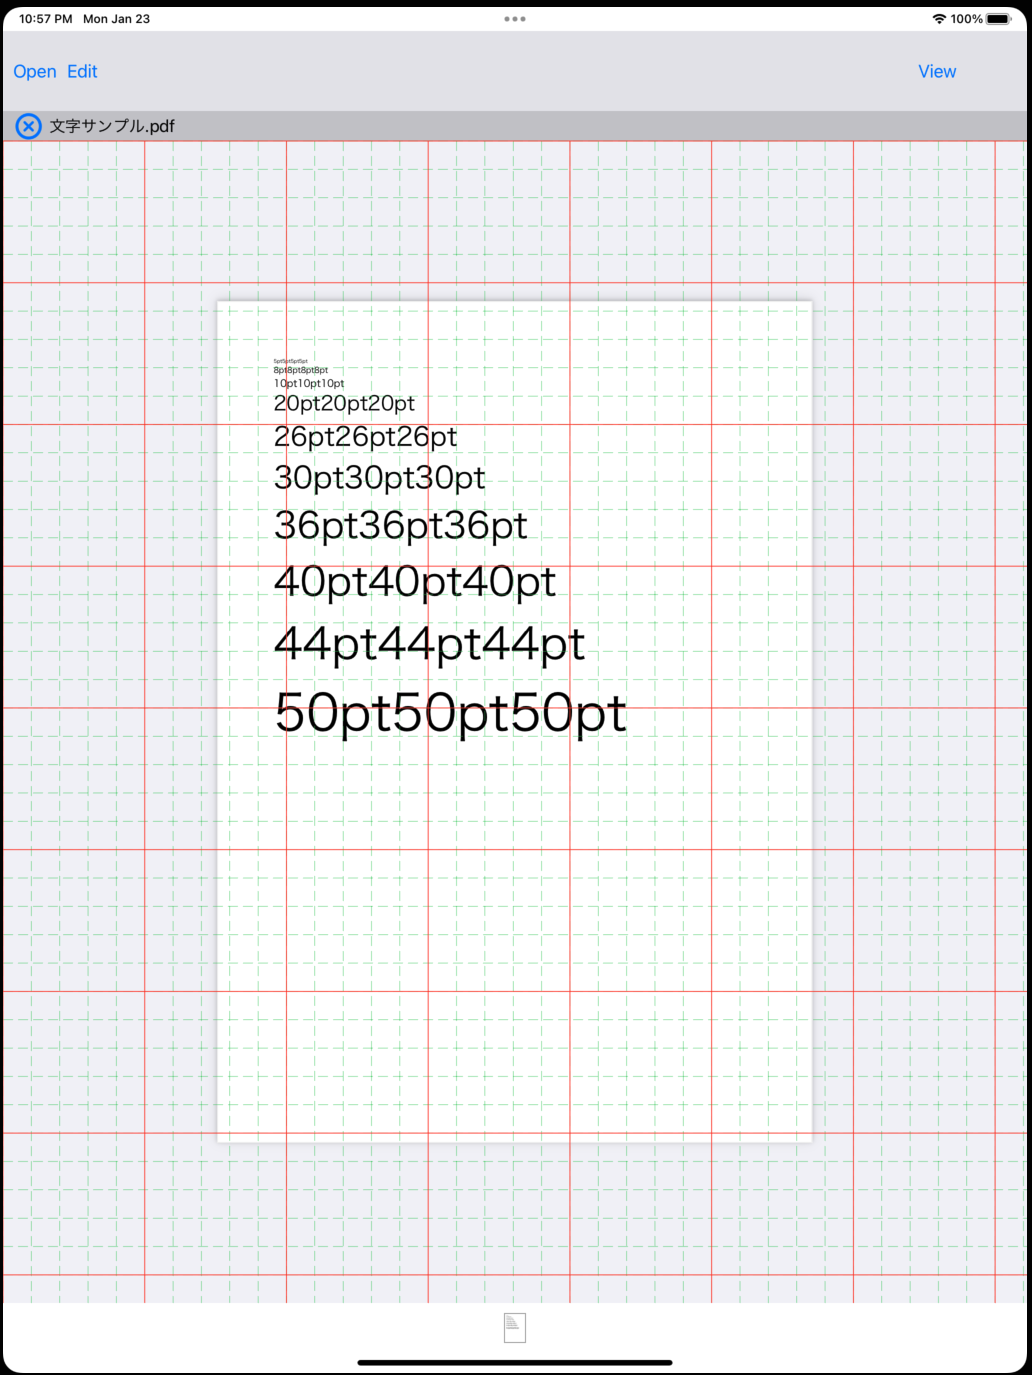
- To remove the grid, select "View" > "Grid" again.
Change type gauge and grid settings
This section describes changing display settings for type gauge and grids.
- Select "View" > "Setting".

- The settings screen will appear.
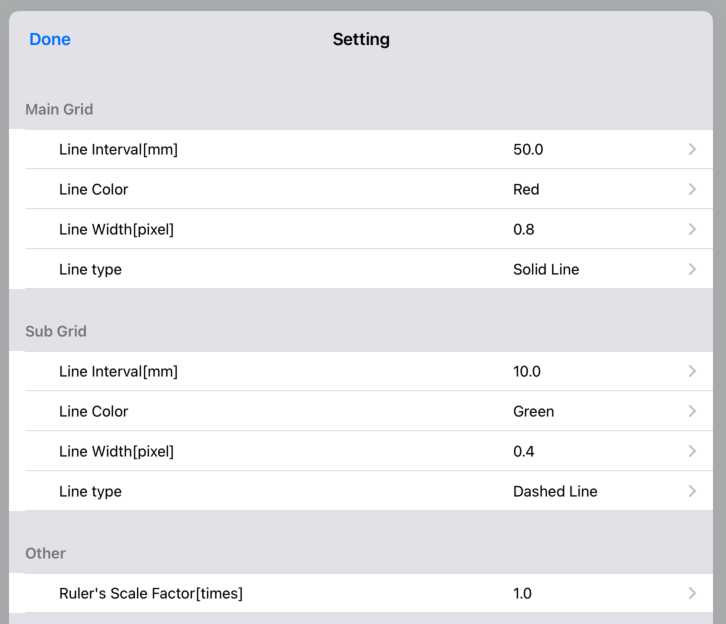
Depending on the manuscript, you may want to change the color of the grid display to make it easier to see. The next item changes the settings for the grid display.
Main Grid: You can set the interval and color of the main line, line thickness, and line type.
Sub Grid: You can set the interval and color of the secondary line, line thickness, and line type.
Images and PDF data can be opened as manuscripts, but the original data is not necessarily converted into data with the correct magnification. The next item allows you to fine-tune the dimensioning of type gauge and grids.
other:
If set to 1.0 or higher, the "grid" and "type gauge" will be displayed larger (when the original data is larger than it actually is)
If set to less than 1.0, the "grid" and "type gauge" will appear smaller (when the manuscript data was digitized smaller than it actually is)
